Print sign-up codes on your startup business cards
I was about to go to a conference but I'd run out of business cards. I always get my business cards from Moo - they're high quality, good value, and arrive quickly. Moo also let you print several different designs in a print run of 100 cards.
While on Moo's site I stumbled across an article describing how Perch printed discount codes on Moo cards to hand out at conferences. It's a brilliant idea, and I decided to print a unique invite code on each of my new business cards, and in this article I'll show you how to do it.
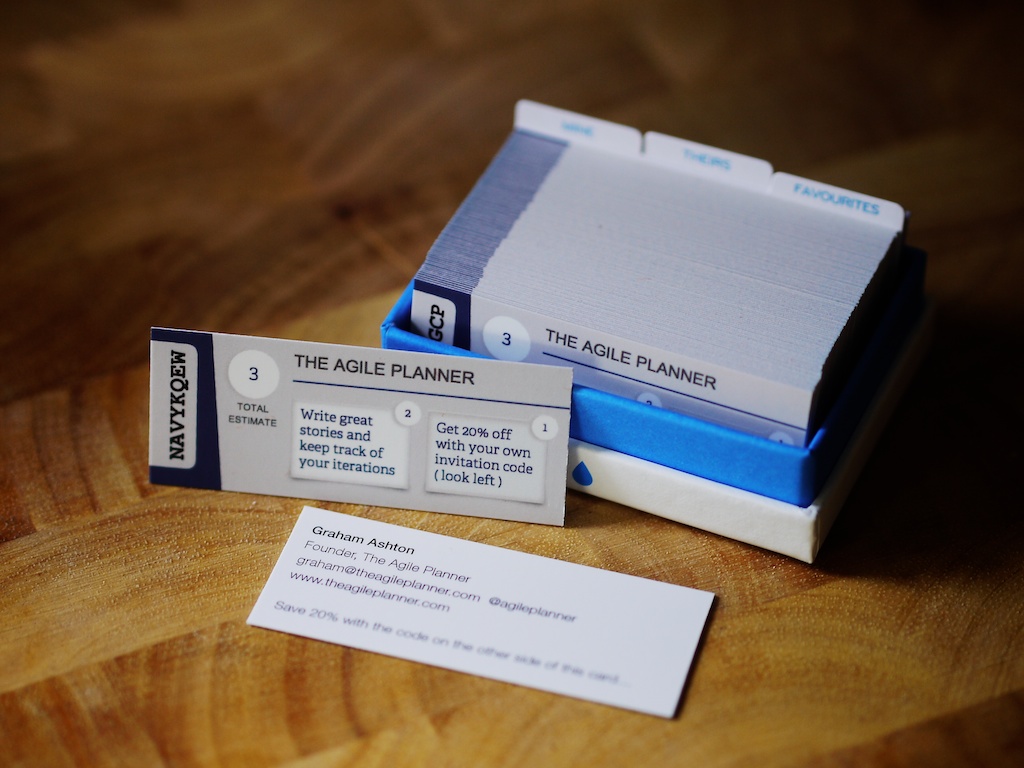
Here's the finished product:
I already had a system in place for sending short codes to the people on the waiting list for Agile Planner's private beta programme (if you'd like an invite head over to the signup page). To hand out codes on cards all I'd have to do was produce the cards, and make sure that each code had a corresponding entry in my database. The signup page was already setup for it. Happy days.
Printing codes on cards
Moo allow you to print a batch of 100 different minicards, each card being printed from a different image. So the challenge is to create 100 different image files of your business card, each with a different code overlayed over the top.
Perch (who I met at the bootstrapd conference in Edinburgh – lovely people) used Adobe Fireworks to add their discount codes to their cards, but I don't have a copy of Fireworks. I'm a command line fan, so the ImageMagick image manipulation tools immediately sprung to mind. After a bit of experimentation I discovered that GraphicsMagick (a fork of ImageMagick) was easier to get going on my Mac, so I'm going to talk you through how I did it with GraphicsMagick. It also runs on Linux and Windows, and the commands I've used below should be fairly easily modified to work with ImageMagick if you're using that instead.
Making a template for your card
I asked Moo what size my images should be. They said I should aim for 875px by 378px, and that I should expect to lose 24px around the edge during the printing process. The final cards would be printed at 300 DPI, and measure 70mm x 28mm.
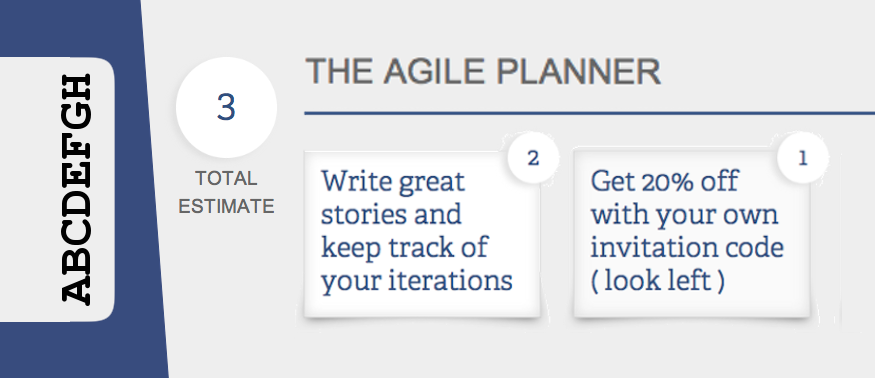
I designed a card based on a screenshot of the app, with some space on the left for me to print the invite codes with GraphicsMagick. Here's the template in Pixelmator:
![]()
Adding codes to the template
You'll need to install GraphicsMagick. The easiest way to do this on a Mac is with Homebrew. Once you've got Homebrew installed, install GraphicsMagick with the brew command:
$ brew install graphicsmagick
You may need to follow a few homebrew prompts to get it installed. If you get stuck, I'm using version 1.3.15 on OS X 10.8 (Mountain Lion). Mountain Lion doesn't come with an X server, so I had to install X Quartz as well.
Now I just had to work how to get GraphicsMagick to print a code on my business card template. With some trial and error I discovered that this incantation (typed into the Terminal) would print the code ABCDEFGH in the right position on my card:
$ gm convert -density 288 -font Courier-Bold \
    -draw "rotate -90 text -305,90 'ABCDEFGH'" \
    business-card.png test.png
The template is stored in a file called business-card.png. The finished card is written to test.png. The co-ordinates passed to the text command are the x and y offset into the file at which the text should be drawn. If I hadn't rotated the text through 90 degrees both those numbers would be positive. If you want to add horizontal text start with small positive numbers and tweak it from there.
If you'd like to change the font, this command will report which fonts GraphicsMagick knows about:
$ gm convert -list type
Plenty more information is available in the gm(1) man page.
So that's one code sorted – how do you run that 100 times? A quick shell command came to the rescue, but I didn't want to have remember how to re-run the loop every time I need to make more cards, so I saved it in a script. You can get it from the moo-card-codes GitHub repository. This command will download it for you:
$ curl -L -O https://raw.github.com/gma/moo-card-codes/master/moo-card-codes
Put your invite codes in a file and feed it to the script as standard input. If you're not sure what that means, try something like this (where /tmp/codes is the path to my file that contains my invite codes):
$ sh moo-card-codes < /tmp/codes
Creating card-001.png with code SDUAQKCY
Creating card-002.png with code RNMQYVDB
Creating card-003.png with code NHKFVIEU
Creating card-004.png with code BHUDMWKX
Creating card-005.png with code TYEWAKSP
...
The script will expect to find a file in the current directory called business-card.png, and will produce a bunch of PNG files from it named card-001.png, etc.
You can override the settings in the script by editing the variables at the top. You can also temporarily redefine most of the variables on the command line before you run it:
$ TEMPLATE=my-card.png FONT=Helvetica sh moo-card-codes < /tmp/codes
Here's what a finished card looks like (everything will appear a lot smaller when printed by Moo):
Getting your cards printed
Moo's UI isn't the easiest to use when you're uploading 100 images, so I've included a quick screenshot here.
The first thing to note is that my browser didn't like it when I dragged and dropped 100 cards into the big green panel in one go. It crashed Safari, so when I tried again I dragged in 20 cards at a time and waited for the last batch to finish uploading before dragging some more in. I've no idea if this is strictly necessary, but it's not the quickest process and I didn't want to have to go through it again.
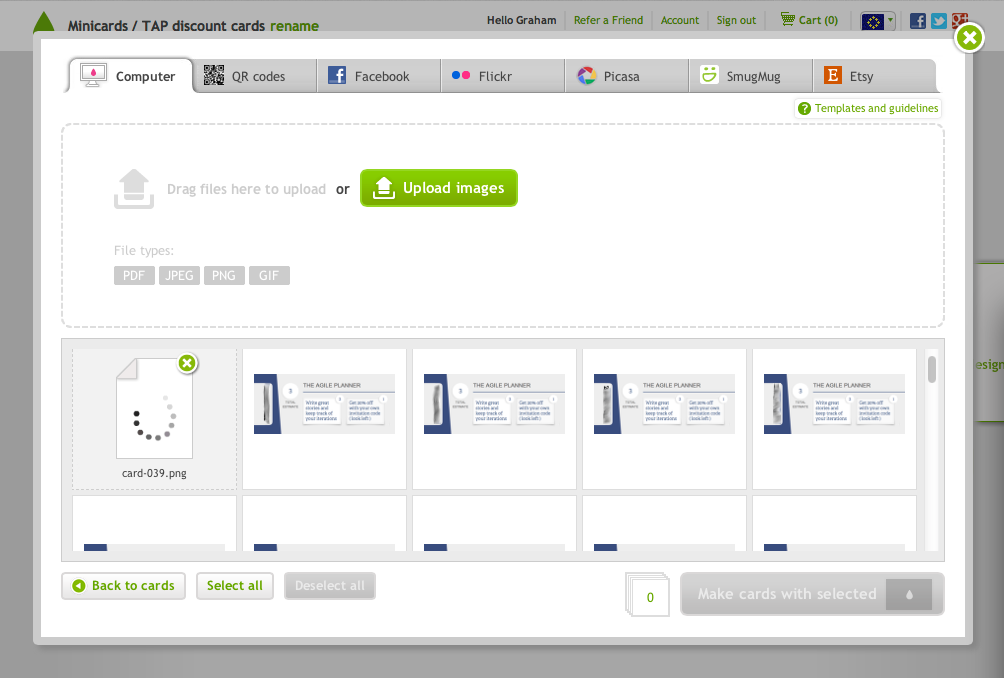
When all your images have finished uploading, click "Select all" and then "Make cards from selected". Seems obvious now I've said it, but it wasn't at all obvious what to do until I'd clicked "Select all", and I was rather nervous that I might have to go through the whole upload procedure again if I made one wrong move.
Getting a discount at Moo
Finally, once I'd completed my order Moo gave me a referral code. If you use it I'll get free stuff in my Moo account, but more importantly you'll get 10% off your order. Here's the referral URL: http://www.moo.com/share/sr5nfj
Don't feel obliged to use it. I don't normally bother with referral codes; I've included this one because it's a win-win.